Ensuring Photo Quality for Portraits: A Family Approach
Family portraits capture more than faces. They freeze the laughter, affection, and quirks that make your family truly unique. Most people think you need a posh camera and a studio full of fancy kit. The real secret is that even modern smartphones can produce stunning portraits. In fact, choosing a lens between 50mm and 85mm or using diffused natural light can make your family photos look truly professional. Discover how a bit of preparation and some simple steps can turn your next family photo session into a moment you will treasure for years.
Table of Contents
- Step 1: Prepare Your Equipment And Setting
- Step 2: Adjust Camera Settings For Optimal Capture
- Step 3: Position Subjects For Best Lighting And Composition
- Step 4: Take Test Shots And Evaluate Results
- Step 5: Finalise Settings And Capture The Portraits
Quick Summary
| Key Point | Explanation |
|---|---|
| 1. Select the Right Equipment | Choose a camera with good low light capability and a lens of 50mm-85mm for flattering portraits. |
| 2. Use Natural Light for Best Results | Position subjects near windows or outdoors during golden hours to achieve soft, flattering illumination. |
| 3. Prioritise Comfortable Subject Positioning | Arrange subjects dynamically, fostering natural interactions and comfort to capture authentic emotions. |
| 4. Take Test Shots Before Final Capture | Use test shots to assess focus, lighting, and composition; adjust settings and positioning as needed. |
| 5. Create a Relaxed Atmosphere | Foster a calm environment with music or gentle conversation to ensure subjects feel at ease and natural. |
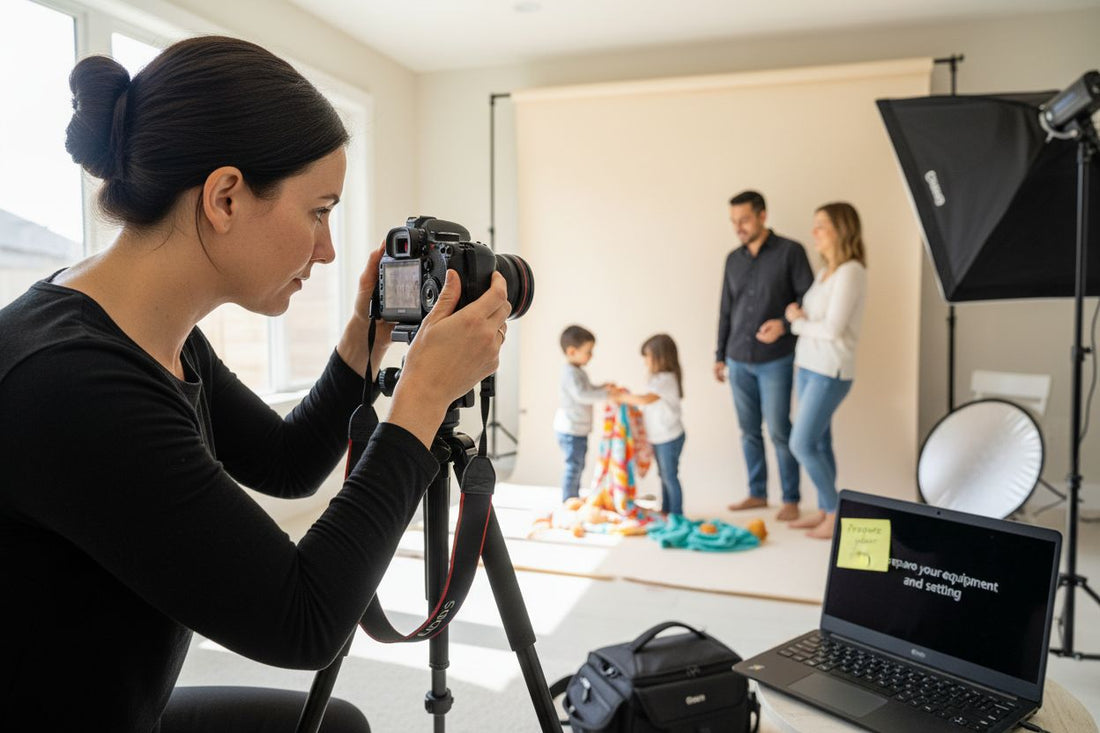
Step 1: Prepare Your Equipment and Setting
Ensuring photo quality for portraits begins long before you press the camera shutter. Successful family portrait photography requires thoughtful preparation of both your equipment and the physical environment where you will capture memories.
Start by selecting the right camera and lens combination. While professional cameras offer exceptional quality, modern smartphones with advanced camera systems can also produce stunning portraits. Choose a camera with good low light performance and a lens that allows for soft background blur. A lens with a focal length between 50mm and 85mm provides the most flattering perspective for human subjects.
Lighting is the cornerstone of exceptional portrait photography. Natural light works best for family portraits, so position your subjects near large windows or plan an outdoor shoot during the golden hours just after sunrise or before sunset. Soft, diffused light eliminates harsh shadows and creates a warm, flattering effect on skin tones. If indoor lighting is your only option, use soft box lights or bounce external flash units off white walls to create gentle, even illumination.
Prepare your setting with careful consideration. Select backgrounds that complement your subjects without competing for visual attention. Neutral walls, simple outdoor landscapes, or minimal interior spaces work wonderfully. Ensure the background is clean and uncluttered, allowing your family members to be the focal point. Remove distracting objects and choose colours that harmonise with your subjects’ clothing.
Consider practical aspects of your shooting environment. Have comfortable seating available for younger children or elderly family members. Keep water and light snacks nearby to maintain everyone’s energy and mood. Bring a few props or blankets that can help create interesting compositions or provide comfort during the shoot.
Technical preparation matters as much as creative setup. Charge camera batteries fully, format memory cards, and pack spare batteries and storage. Check camera settings in advance: set appropriate white balance, select a moderate ISO to reduce noise, and choose an aperture that provides sufficient depth of field to keep all subjects sharp.
Successful portrait preparation transforms an ordinary photo session into a memorable experience. By investing time in equipment selection, lighting consideration, and thoughtful staging, you create the perfect foundation for capturing genuine, emotive family moments.
Step 2: Adjust Camera Settings for Optimal Capture
Camera settings play a pivotal role in transforming an average snapshot into a professional quality family portrait. Understanding and mastering your camera’s key settings will dramatically improve image clarity, colour accuracy, and overall visual impact.
Begin by selecting the appropriate shooting mode. While automatic settings might seem convenient, manual or aperture priority modes provide significantly more creative control. In aperture priority mode, you can manage depth of field, which determines how much of your portrait remains in sharp focus. For family portraits, aim for an aperture between f/2.8 and f/5.6, which allows sufficient background blur while keeping all family members crisp and clear.
ISO sensitivity directly influences image quality and noise levels. In well-lit environments, keep your ISO low (100-400) to maintain image clarity. When shooting indoors or during darker times, you might need to increase ISO (800-1600), but be cautious. Higher ISO settings introduce digital noise that can reduce portrait quality. Modern cameras handle higher ISO ranges more effectively, so experiment to find your camera’s optimal performance threshold.
Focus is crucial in portrait photography. Use single point autofocus and position your focus point directly on the eyes of your main subject. This technique ensures the most important facial feature remains razor sharp. For group portraits, select a focus point that captures the nearest person’s eyes, which helps maintain overall image sharpness.
White balance represents another critical setting affecting portrait aesthetics. Different light sources produce varied colour temperatures, which can make skin tones appear unnaturally cool or warm. Most cameras offer preset white balance options like daylight, cloudy, tungsten, and fluorescent. When possible, shoot in RAW format, which allows more flexible colour temperature adjustments during post processing.
Shutter speed management prevents motion blur and ensures crisp images. For stationary family portraits, aim for a minimum shutter speed of 1/125th of a second. If children or pets are involved, increase to 1/250th or faster to freeze unexpected movements. Stabilise your camera using a tripod or rest it on a solid surface to minimise unintentional camera shake.
Verify your settings by taking a test shot and reviewing the image. Check focus accuracy, exposure balance, and colour rendition. Most digital cameras provide a preview screen that allows immediate assessment. If something seems off, make incremental adjustments and repeat until you achieve the desired result.
Remember, technical perfection serves your creative vision. These settings are guidelines, not strict rules.
Trust your artistic instinct and be prepared to experiment. The most memorable family portraits often emerge from a combination of technical skill and spontaneous moments.
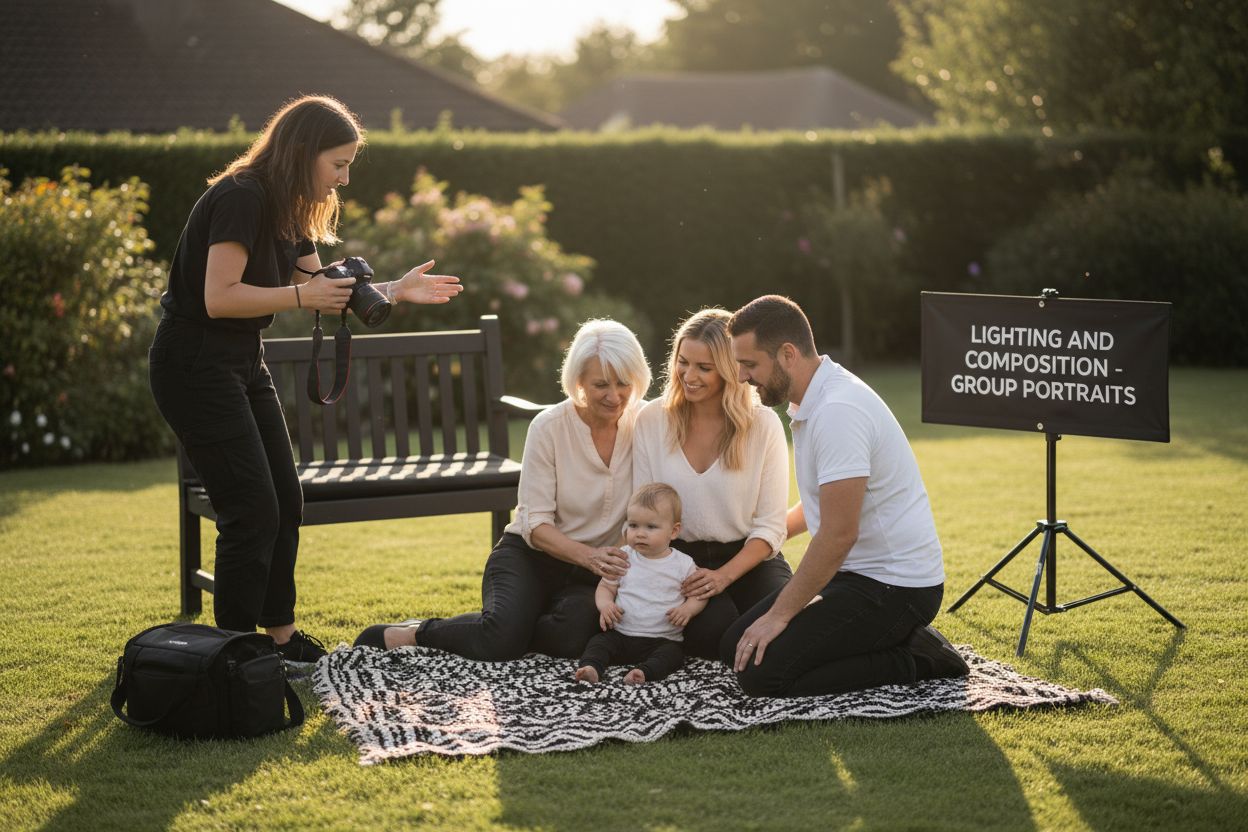
Step 3: Position Subjects for Best Lighting and Composition
Positioning subjects effectively transforms an ordinary photograph into a compelling family portrait. Lighting and composition are the twin pillars that elevate visual storytelling, creating images that resonate with emotion and personality.
Start by understanding natural light dynamics. Soft, diffused light produces the most flattering results. Position family members near large windows or in outdoor settings with gentle, indirect sunlight. Avoid harsh midday sunlight, which creates unflattering shadows and squinting. The golden hours just after sunrise or before sunset offer magical, warm illumination that dramatically enhances skin tones and creates a soft, ethereal quality.
Composition requires thoughtful arrangement of subjects. Instead of rigid, traditional lineups, create dynamic interactions that reveal relationships. Encourage natural poses that reflect genuine family connections. For group portraits, stagger subjects at different heights and depths to create visual interest. Taller family members can stand behind, while children or seated individuals occupy the foreground. This layered approach adds depth and prevents a flat, uninspired arrangement.
Consider the emotional narrative of your portrait. Discover our streamlined portrait ordering process which can help families prepare for their photoshoot. Allow subjects to interact naturally rather than forcing artificial smiles. Candid moments often capture the most authentic family dynamics. Encourage gentle physical contact like hands on shoulders, arms around each other, or playful interactions that reveal genuine relationships.
Body positioning matters significantly. Angle bodies slightly rather than facing the camera directly, which creates more dynamic and flattering lines. For couples and family groups, create gentle triangular or circular compositions that guide the viewer’s eye through the image. Avoid perfectly symmetrical arrangements, which can feel static and uninteresting.
Pay special attention to individual subject comfort. Children and elderly family members might require specific positioning considerations. Provide comfortable seating or support, and be patient. Allow breaks and maintain a relaxed atmosphere. A comfortable subject translates into more natural, compelling photographs.
Verify your composition by periodically checking your camera’s preview screen. Look for balanced lighting, clear facial expressions, and harmonious subject placement. Move subjects slightly, adjust angles, and experiment. Remember that technical perfection matters less than capturing genuine emotional connections. The most memorable family portraits are those that tell a story, revealing the unique bond between family members.
Step 4: Take Test Shots and Evaluate Results
Test shots are the critical diagnostic tool that bridges your initial setup and final portrait quality. These preliminary images reveal subtle technical and compositional nuances that might otherwise go unnoticed, allowing you to make precise adjustments before capturing your final family portrait.
Initiate your test shot process by taking several images from slightly different angles and perspectives. Use your camera’s preview function to examine each shot meticulously. Focus specifically on facial details, checking that eyes are sharp, expressions are natural, and no unflattering shadows obscure key features. According to encyclopedic photography research, professional photographers often take multiple test shots to ensure optimal results.
Zoom into your preview screen to assess image sharpness and detail. Look for subtle elements like potential hair flyaways, uneven clothing, or slight facial asymmetries that could detract from the overall portrait quality. Pay particular attention to skin tones, ensuring they appear natural and consistent across different family members.
Light evaluation forms another crucial aspect of test shot analysis. Carefully examine how light falls across subjects, checking for any harsh shadows or overly bright areas that might wash out facial features. If digital previews reveal uneven lighting, adjust your positioning or supplementary lighting sources. Soft, diffused light should gently illuminate faces, creating a flattering and professional appearance.
Composition assessment goes beyond technical measurements. Consider the emotional narrative your test shots communicate. Do the subjects look comfortable? Are their interactions genuine? Family portraits should capture more than physical appearance they should reveal relationships, personalities, and shared connections.
Be prepared to make incremental adjustments. Slightly repositioning subjects, changing camera angle, or making minor camera setting modifications can dramatically improve image quality. Communicate openly with your family members during this process, keeping the atmosphere relaxed and enjoyable.
Verify your test shots against these key criteria:
- Facial expressions appear natural and relaxed
- Lighting is soft and evenly distributed
- All subjects are in sharp focus
- Background complements rather than competes with subjects
- Composition tells a compelling visual story
Remember that test shots are a learning process. Each image provides valuable information, guiding you towards the perfect family portrait.
 Patience and willingness to experiment separate good photographs from extraordinary memories. Trust your creative instinct while remaining technically precise.
Step 5: Finalise Settings and Capture the Portraits
The moment of capturing family portraits represents the culmination of careful preparation and technical precision. This final stage transforms your meticulous planning into lasting memories, blending technical skill with emotional storytelling.
Before pressing the shutter, conduct a final comprehensive equipment and subject check. Ensure camera battery levels are sufficient, memory card has adequate space, and all previously tested camera settings remain optimal. Create a calm, supportive environment that helps subjects feel relaxed and comfortable. Soft background music or gentle conversation can help reduce tension and produce more natural expressions.
Learn how to create truly unique family portrait memories by maintaining an engaging and interactive photoshoot atmosphere. Encourage natural interactions between family members rather than rigid, forced poses. Move around your subjects, capturing candid moments alongside more structured compositions.
Utilise continuous shooting mode to capture a sequence of images. This technique increases your chances of obtaining that perfect shot where everyone looks their best. Facial expressions can change rapidly, and what seems like a slight moment can become a cherished family memory. Rapid sequential shots provide multiple options, allowing you to select the most compelling image later.
Pay special attention to timing and rhythm during the photoshoot. Children and elderly family members might have limited patience, so work efficiently. Break the session into short segments, offering breaks and maintaining a playful, relaxed mood. Use gentle directions and positive reinforcement to guide subjects into flattering positions without creating artificial tension.
Technical precision matters, but emotional authenticity matters more. Watch for spontaneous moments of genuine connection unscripted smiles, shared laughter, or tender interactions. These unplanned instances often produce the most memorable portraits. Be ready to capture these fleeting moments by keeping your camera accessible and settings prepared.
Verify your final images against these critical criteria:
The following table provides a practical checklist to help you verify your portrait session setup before capturing the final images.
| Verification Criteria | What to Look For |
|---|---|
| Subject Comfort | Subjects appear relaxed and at ease |
| Lighting | Soft, even, and flattering illumination |
| Focus | All key faces are sharp and in clear focus |
| Background | Clean, uncluttered, and complements the subjects |
| Composition | Natural interactions, depth, and pleasing arrangement |
| Expressions | Genuine smiles and emotional connection |
| Camera Settings | Correct exposure, white balance, and minimal noise |
| Technical Elements | No unwanted blur, correct shutter speed and ISO |
- Subjects appear relaxed and natural
- Lighting is consistent and flattering
- Facial expressions capture genuine emotions
- Composition tells a compelling family story
- Technical elements like focus and exposure are precise
Remember that portrait photography is both an art and a science. Technical mastery provides the foundation, but emotional intelligence and patience truly transform photographs into treasured family heirlooms. Embrace imperfections, celebrate genuine moments, and approach each portrait session as a unique opportunity to document your family’s evolving narrative.
Transform Your Family Photos into Timeless Portraits
After investing so much care into your family photography, are you worried those precious memories might stay buried on your device? The challenge of ensuring photo quality can be overwhelming, from lighting to composition and capturing natural expressions. You have done the hard work – now let your family portraits truly shine.

Experience the joy of seeing your loved ones brought to life in a hand-crafted custom portrait. At The Family Portrait Company, we specialise in turning your best family and pet photos into stunning works of art. Explore our custom portrait collections to see how easy it is to preserve genuine moments for generations to come. Do not let your favourite photo moments fade into the background. Visit https://familyportraitcompany.com and start creating your unique family keepsake today.
Frequently Asked Questions
What camera settings should I use for family portraits?
For family portraits, it’s recommended to shoot in manual or aperture priority mode, with an aperture between f/2.8 and f/5.6 for good depth of field. Use a low ISO (100-400) in well-lit conditions, and ensure a minimum shutter speed of 1/125th of a second to prevent motion blur.
How can I ensure proper lighting for family portraits?
Utilise soft, diffused natural light for the best results. Position subjects near large windows or shoot outdoors during the golden hours just after sunrise or before sunset to achieve flattering lighting. Avoid harsh midday sun to prevent unflattering shadows.
What is the importance of background selection in family portraits?
Selecting a simple, clean background that complements your subjects is vital. Neutral walls, minimal outdoor settings, or uncluttered spaces help keep the focus on the family, enhancing the overall portrait quality.
How do I create natural poses for family portraits?
Encourage genuine interactions among family members instead of stiff poses. Arrange them at different heights and angles and suggest physical contact like hands on shoulders. This approach reveals relationships and creates a more authentic emotional narrative.
Recommended
- Streamlined Portrait Order Workflow for Parents – The Family Portrait Companys
- How to Personalize Family Portraits for Unique Memories – The Family Portrait Companys
- What is a Family Portrait Session? Understanding Its Importance – The Family Portrait Companys
- Custom Portrait Checklist: Create Stunning Family Artworks – The Family Portrait Companys