
How to Organise Photo Sessions for Pet Portraits at Home
Every pet owner knows that sharing a home with a furry companion means wanting to capture those unforgettable family moments. Finding ways to create stunning portraits of your pets not only preserves precious memories but also adds a personal touch to your home decor. With thoughtful preparation, the right lighting, and a calm environment, you can create custom portraits that highlight your pet’s true spirit and make every room feel warmer and more inviting.
Table of Contents
- Step 1: Prepare Your Home And Choose Suitable Locations
- Step 2: Select Props And Coordinate Pet Grooming
- Step 3: Arrange Lighting And Camera Settings
- Step 4: Capture Candid And Posed Moments With Your Pets
- Step 5: Review Photos And Select The Best For Portraits
Quick Summary
| Key Insight | Explanation |
|---|---|
| 1. Choose well-lit spaces | Select areas in your home with natural light to create flattering portraits. Avoid harsh overhead lights that produce unappealing shadows. |
| 2. Declutter for focus | Ensure the background is clear of distractions, allowing your pet to remain the centre of attention in your portraits. |
| 3. Prioritise pet comfort and safety | Prepare a comfortable space with familiar items, ensuring your pet feels secure and relaxed during the photo session. |
| 4. Mix candid and posed shots | Use a combination of spontaneous and directed photography to capture both your pet’s personality and best features effectively. |
| 5. Review and select outstanding images | After the session, carefully choose images that showcase your pet’s expressions and detail through systematic reviewing for emotional and technical impact. |
Step 1: Prepare your home and choose suitable locations
Before your pet portrait session begins, your home needs to become a calm, controlled environment where your pet feels relaxed and behaves naturally. The right preparation transforms an ordinary room into a professional-looking portrait studio, and it all starts with understanding what works best for your specific space and pet.
Start by identifying the quietest, most well-lit areas in your home. Natural light from windows or doors is your best ally for creating flattering, professional-looking portraits. Walk through your home at different times of day to see where sunlight streams in most clearly. A living room with large windows, a bedroom with soft morning light, or even a garden space can work brilliantly. Avoid rooms with harsh overhead lighting or areas where artificial lights create unflattering shadows on your pet’s face.
Once you’ve identified your location, declutter the background thoroughly. Your pet should be the absolute focus of every shot, not the pile of toys, laundry, or books visible behind them. Remove furniture that clutters the frame, tidy away loose items, and consider what’s visible in the background. A neutral wall, garden hedge, or simple sofa works far better than a chaotic backdrop.
Choose quiet, low-traffic areas where your pet already feels comfortable, as familiar surroundings help them behave naturally during the session.
Next, prepare the physical space for your pet’s comfort and safety. Set out fresh water nearby so your pet stays hydrated. Clear any breakable items from the shooting area. Make sure the temperature is comfortable, neither too hot nor too cold. If your pet tends to get anxious in unfamiliar setups, photograph them in spaces where they frequently relax, such as their favourite spot on the sofa or a corner of the garden they love.
Consider which rooms have the least foot traffic and fewest distractions. A bedroom is often quieter than a kitchen, a garden corner more peaceful than a hallway. Check the room for potential hazards like loose wires, sharp furniture corners, or open doors leading to the street. Your pet’s safety comes first, and a comfortable pet photographs better every single time.
Take a few test photos with your phone to see how the light behaves in your chosen space. Notice where shadows fall, where light is brightest, and whether the background works visually. This quick test takes five minutes but saves you from discovering halfway through the session that the light has changed or the backdrop looks wrong.
To help you choose the perfect setting for your pet portraits, here’s a summary of space, lighting, and safety considerations:
| Consideration | Why It Matters | Example Approach |
|---|---|---|
| Natural Lighting | Creates soft, flattering images | Use large window light |
| Quiet Environment | Helps pet stay relaxed | Select bedroom or lounge |
| Clutter-Free Space | Pet is true focal point | Remove toys and laundry |
| Pet Safety | Prevents accidents | Check for loose wires |
| Comfort | Encourages natural behaviour | Provide fresh water nearby |
Pro tip: Schedule your session during the golden hours just after sunrise or before sunset when natural light is warmest and most flattering, then position your pet near a window to catch that gorgeous side lighting without harsh shadows.
Step 2: Select props and coordinate pet grooming
Your pet’s appearance and the props you choose will define the overall quality and character of your portraits. This step involves two key tasks: getting your pet looking their absolute best and selecting props that enhance rather than distract from their personality.
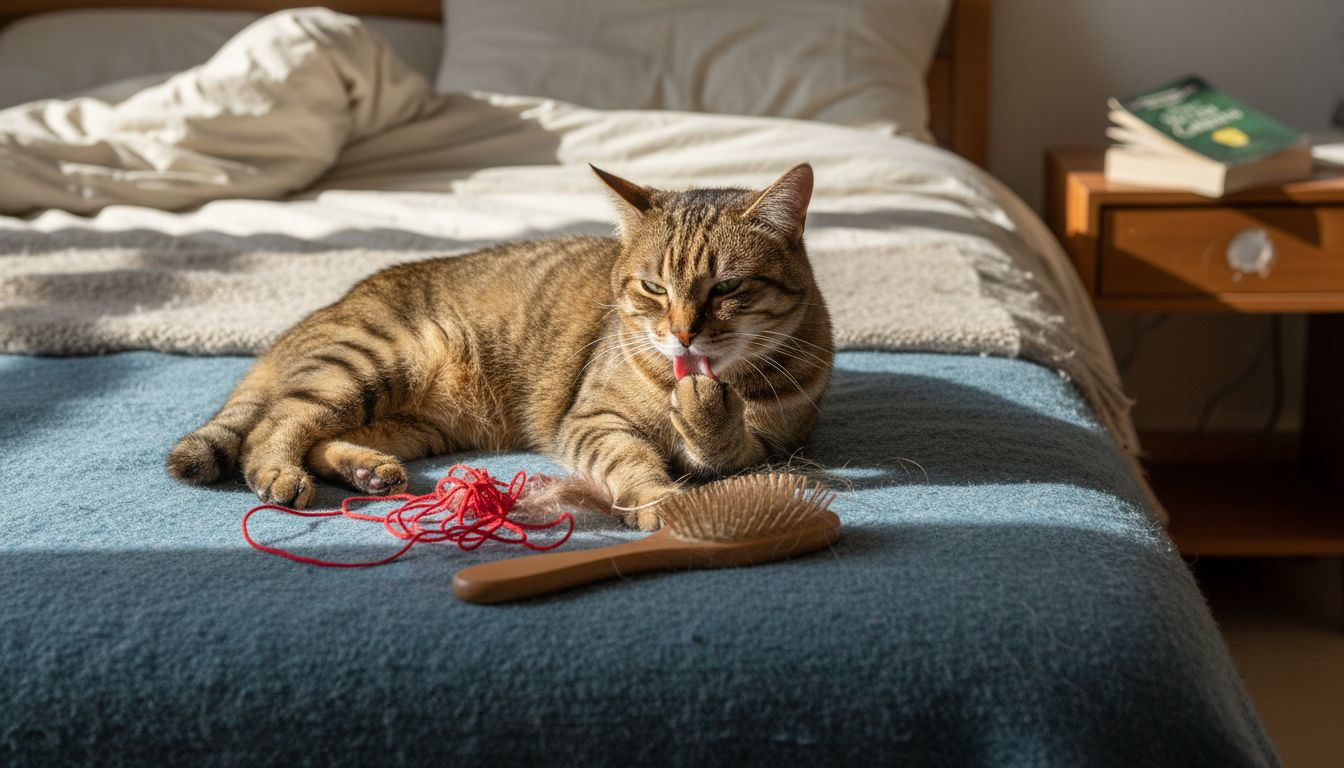
Start with grooming at least two to three days before your photo session. This timing allows any grooming products to settle and your pet’s coat to return to its natural texture. Regular brushing, bathing, and trimming help enhance your pet’s appearance and comfort during the shoot. Pay special attention to matted fur, dirt, or tangles that the camera will pick up instantly. For dogs, a clean, well-groomed coat shows off their features beautifully. For cats, gentle brushing removes loose fur and creates a sleek appearance.
If your pet needs professional grooming, schedule the appointment three to four days before the session. Professional groomers can trim nails, clean ears, and tidy up your pet’s appearance in ways that create a polished look without appearing overly done. Avoid grooming the day before or day of the shoot, as freshly groomed pets sometimes look too stiff or fluffy.
Props should complement your pet without overwhelming the scene, enhancing personality and mood rather than distracting from your pet’s natural charm.
Now for props. The best props are items your pet already knows and loves. Choose familiar elements that reflect your pet’s character and help them feel relaxed during the session.
Great prop ideas include:
- Favourite toys or chew toys that keep your pet engaged and occupied
- Soft blankets or cushions where your pet typically nests or rests
- Seasonal items like autumn leaves, spring flowers, or cosy scarves that complement the mood
- Treats for motivating your pet during the shoot
- Collars, leads, or harnesses that coordinate with your home décor
Keep props minimal and thoughtful. A single beloved toy or a favourite blanket works better than scattering multiple items around your pet. Props should feel naturally integrated into the scene, as if your pet just happened to be photographed in their favourite spot with their preferred possessions.
Test how props interact with your pet beforehand. Some pets get distracted by toys, whilst others relax when holding something familiar. Watch how your pet responds to each prop choice and adjust accordingly.
Pro tip: Groom your pet three days before the session and choose one or two meaningful props that your pet already loves, as familiar items help pets stay calm and photographed authentically rather than posed awkwardly.
Step 3: Arrange lighting and camera settings
Lighting and camera configuration are the technical foundations that transform an ordinary snapshot into a professional-quality portrait. Getting these right takes practice, but understanding the basics will dramatically improve every image you capture.
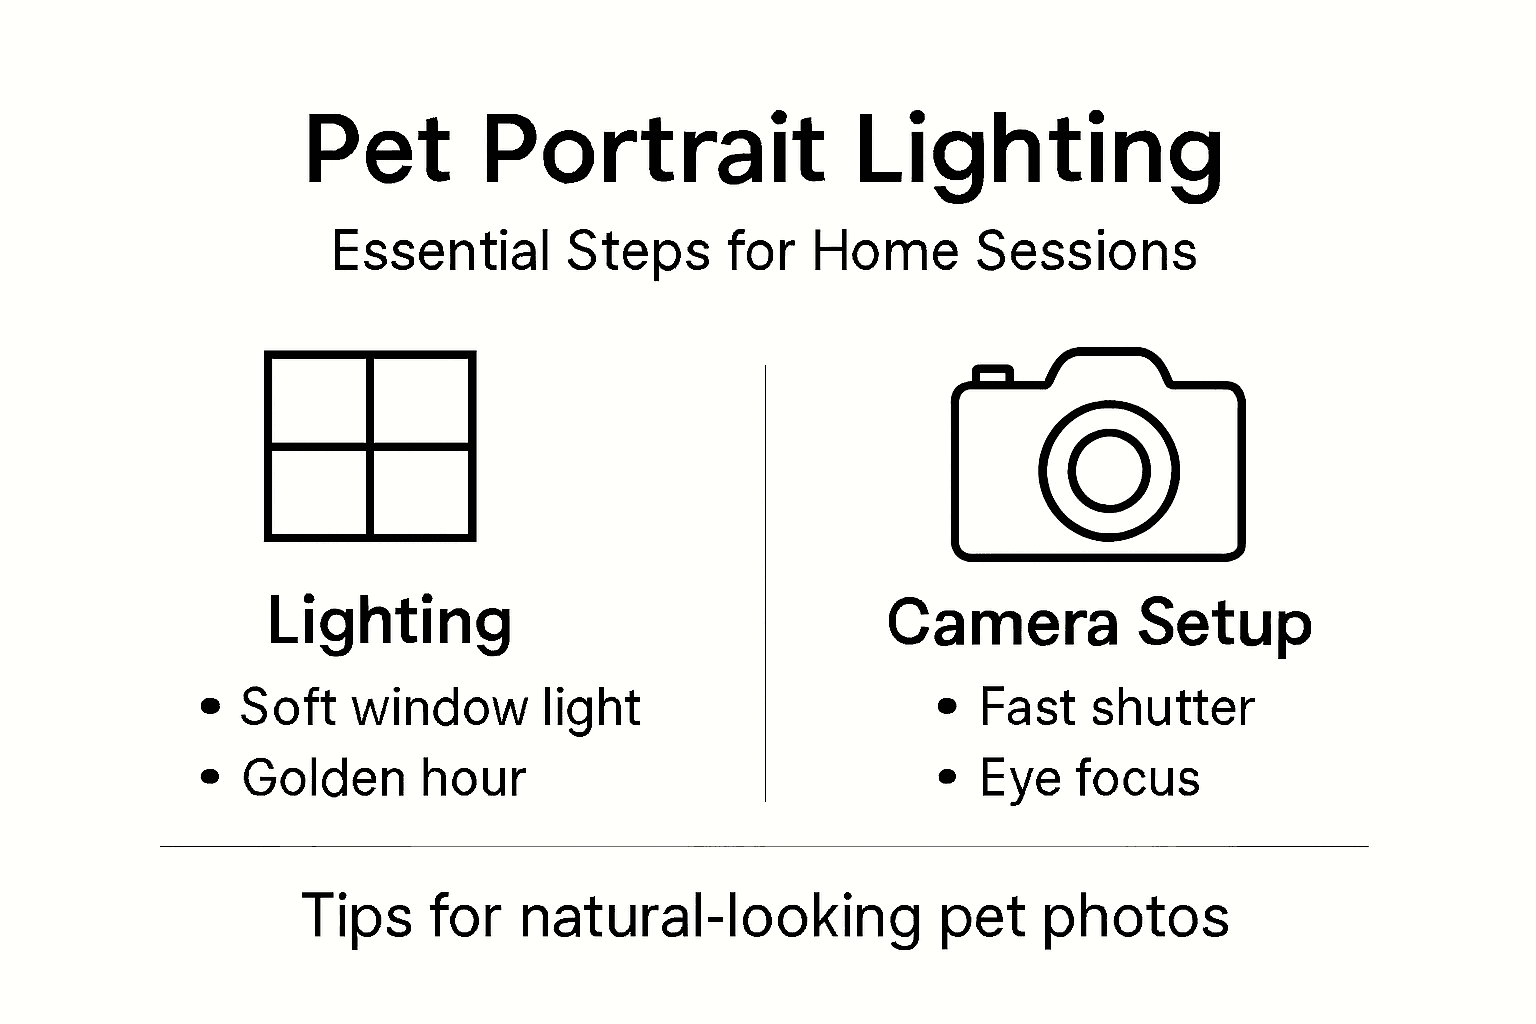
Start by maximising natural light, which is your most valuable asset for pet portraits. Position your pet near a window where soft, indirect light streams in without harsh shadows across their face. Early morning or late afternoon light is ideal, as the sun sits lower and creates a warm, flattering glow. Avoid shooting during midday when overhead sun creates unflattering shadows under the eyes and nose.
If natural light is insufficient, you can add a simple artificial light source, but keep it soft. A bedside lamp with a white shade or a soft-box positioned at an angle helps fill in shadows without creating harsh glare. Soft light reduces harsh shadows and creates flattering images that showcase your pet’s features beautifully.
Use window light positioned to one side of your pet’s face, creating gentle dimension without overwhelming brightness or dark shadows.
Now for your camera settings. These three elements matter most for pet portraits.
Key camera adjustments:
- Aperture (f-stop): Use a wide aperture like f/4 to f/8 to create a soft, blurred background that keeps focus on your pet
- Shutter speed: Set it fast enough to freeze movement, typically 1/250th of a second or faster for active pets
- ISO: Increase this in low light conditions, though watch for graininess at very high ISO values
If you’re shooting with your phone, tap on your pet’s face to lock focus, then adjust brightness by swiping up or down. Most phones have a portrait mode that mimics a wide aperture and blurs the background beautifully.
Test your settings before the session begins. Take a few test shots in the exact location where you’ll photograph your pet, checking exposure, focus sharpness, and how the background appears. Adjust lighting or camera settings based on what you see in the preview. Most pet photography problems stem from rushing this testing phase.
Pro tip: Position your pet at a 45-degree angle to the window light rather than directly facing it, then use a faster shutter speed of 1/500th second or quicker to freeze any sudden movements or tail wags.
Step 4: Capture candid and posed moments with your pets
The best pet portraits combine both candid shots that reveal genuine personality and posed images that show off your pet’s best side. Learning to balance these two approaches gives you a complete collection of meaningful images for your custom portraits.
Start with candid photography by observing your pet in natural behaviour without interrupting them. Let your pet play, rest, or interact with family members whilst you photograph from the sidelines. Capturing candid moments means preserving spontaneity and genuine expressions rather than forcing artificial poses. Keep your distance, use a longer lens if possible, and take multiple shots to catch those unguarded, authentic moments when your pet’s personality shines through.
Candid shots work best when your pet is relaxed and unaware of the camera. These often turn out to be the most beloved images because they feel true and heartfelt. Watch for natural moments like your pet stretching after a nap, playing with a favourite toy, or snuggling with a family member.
Mix candid shots with posed moments to showcase both your pet’s true character and their best angles for a comprehensive portrait collection.
Now transition to posed photography, which requires more direction and interaction. Ask your pet to sit or stay in a flattering spot using familiar cues or treats. Interact with your pet using toys and encouraging words to create joyful, relaxed expressions during these posed shots.
Tips for successful posed moments:
- Use high-value treats or favourite toys positioned near the camera to capture attention
- Give simple, familiar commands your pet already knows and responds to reliably
- Shoot from your pet’s eye level or slightly above rather than looking down at them
- Take multiple shots in quick succession as your pet’s expression shifts
- Praise and reward your pet between each pose to maintain their enthusiasm
Keep the entire session short and lighthearted. Pets have limited patience, and a stressed or bored pet photographs poorly. Alternate between candid moments and posed shots, moving location or changing activities every few minutes to keep your pet engaged and interested.
End the session on a positive note with a final candid shot or play moment. Your pet will associate photo sessions with fun rather than frustration, making future sessions far easier.
The following table compares candid and posed pet photography to guide your session planning:
| Type of Photo | Best For | Capturing Approach | Resulting Image Style |
|---|---|---|---|
| Candid | Natural personality | Let pet act freely | Genuine, spontaneous moments |
| Posed | Highlighting best features | Use cues and props | Polished, eye-contact shots |
Pro tip: Shoot candid moments first when your pet has full energy and enthusiasm, then move into posed photography once they’re slightly more settled, finishing with a final playful candid shot to end on a happy, natural note.
Step 5: Review photos and select the best for portraits
You’ve captured dozens of images, and now comes the rewarding task of finding the standout shots that will become your custom pet portraits. This review process requires both technical eye and emotional connection to choose images that truly represent your pet.
Start by uploading all your photos to your computer or device where you can view them on a larger screen. Create a dedicated folder for this project to keep everything organised. Look through systematically, marking your favourites as you go. Most devices and photo software allow you to flag or star images you like, making the second pass much easier.
When reviewing, prioritise technical quality first. Check that your pet’s eyes are sharp and in focus, as this is critical for any portrait. The face should be well-lit without harsh shadows obscuring features. Composition should feel balanced, with your pet positioned thoughtfully within the frame rather than awkwardly cut off.
Beyond technical aspects, look for emotional impact. The best pet portraits evoke feeling and tell a story about your pet’s personality. Select photos where the pet’s pose or expression reflects their spirit, whether that’s playful, serene, dignified, or affectionate. These images resonate far more than technically perfect but emotionally flat photographs.
Choose images that capture clear focus, good lighting, and expressive moments reflecting the unique bond between pet and owner.
Create a shortlist of your top choices. From this group, select images that show variety: perhaps one active moment, one calm moment, one close-up of the face, and one full-body shot. This variety gives you options when creating your final custom portrait.
Use photo editing software to make minor adjustments if needed. Slight brightness or contrast tweaks can enhance an otherwise excellent image. Cropping can improve composition by removing distracting background elements. However, avoid over-processing, which can make portraits look unnatural.
Consider which images will work best for different portrait styles. A candid moment might suit a lifestyle portrait, whilst a posed shot with clear eye contact works beautifully for a traditional portrait. Match your selected images to the final portrait style you’re envisioning.
Pro tip: Create two separate selections: your top 3-5 images for the primary portrait, and 2-3 secondary options as backups in case your preferred image doesn’t translate to the portrait style as expected.
Bring Your Pet Portraits to Life with Professional Artistry
Capturing the perfect pet portrait at home requires careful preparation, calming environments and a keen eye for natural light and candid moments. If you have followed our guide to organising photo sessions for pet portraits but want to transform your favourite images into stunning keepsakes, we offer custom pet portrait services that celebrate your beloved companion’s unique spirit and personality. Whether you love dogs or cats, our skilled artists create timeless portraits that showcase your pet’s best angles and heartfelt expressions.
Turn your home photo session efforts into cherished artwork today. Explore our collection of Dog Portraits or Cat Portraits to see how we bring photos to life with expert craftsmanship. For lasting memories, visit The Family Portrait Company and start your portrait journey now. Let us help you immortalise your pet’s personality with elegance and care.
Frequently Asked Questions
How can I prepare my home for a pet portrait session?
To prepare your home for a pet portrait session, identify quiet, well-lit spaces with natural light. Declutter the background, ensuring your pet is the focal point, and set up a comfortable environment for your pet before the session begins.
What are the best types of lighting for pet portraits?
The best lighting for pet portraits is soft, natural light during early morning or late afternoon. Position your pet near a window to achieve flattering lighting without harsh shadows on their face.
How should I groom my pet before taking their portraits?
Groom your pet at least two to three days before the session, focusing on brushing and bathing to enhance their appearance. Schedule professional grooming four days prior to help your pet look their best without looking overly styled.
What props should I use for pet portraits?
Choose one or two meaningful props that your pet already loves, such as favourite toys or blankets, to make the session more relaxed and enjoyable. Ensure the props complement your pet’s personality without overwhelming the scene.
How do I capture both candid and posed moments during the session?
Begin the session with candid photography to capture your pet’s natural behaviour and genuine expressions, then transition to posed shots using treats or familiar commands. Alternate between both styles, allowing your pet to stay engaged throughout the session.
How can I review and select the best photos for portraits?
After the session, upload your photos to a device for a detailed review. Check for focus, lighting, and emotional impact, then create a shortlist of 3-5 images that showcase both variety and your pet’s personality.
Recommended
- Pet Photo Tips for Perfect Personalised Portraits – The Family Portrait Companys
- How to Prepare Portrait Photos for Custom Pet Art – The Family Portrait Companys
- 7 Creative Family Photos at Home Ideas for Pet Owners – The Family Portrait Companys
- Step by Step Pet Photo Guide for Custom Portraits – The Family Portrait Companys